Showing posts with label baby. Show all posts

Monday, August 1, 2011

Babyville Boutique!! Diapers will never be the Same!

bb4
I am so excited to share with you all a new item being offered at a store near you soon! A wonderful diapering diva has put together a 60 page instruction/pattern book on how to cloth diaper and so much more!

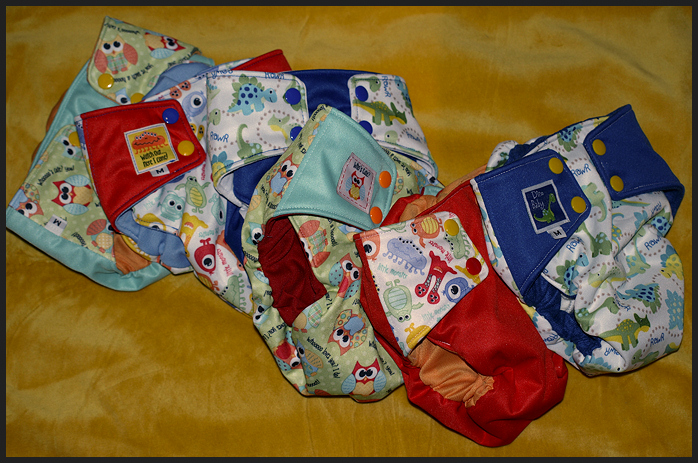
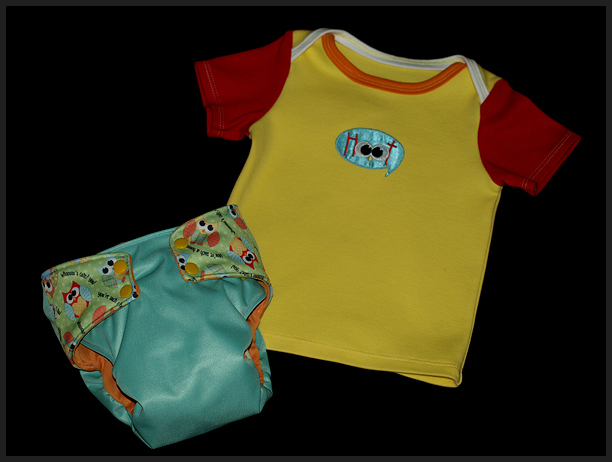
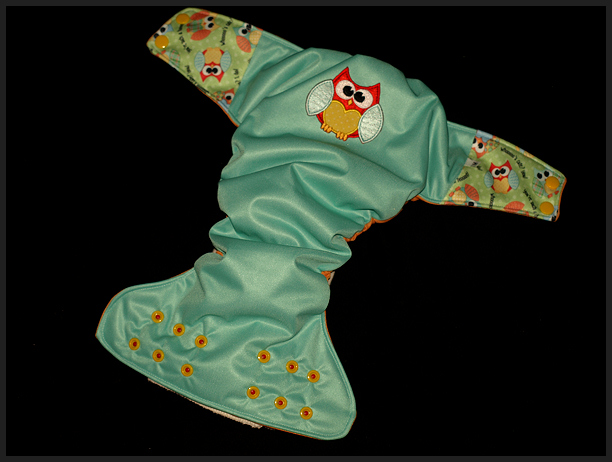
Beautiful PUL prints and solids, matching tags and appliques, foe, snaps, hook/loop tape, oh so much more!!
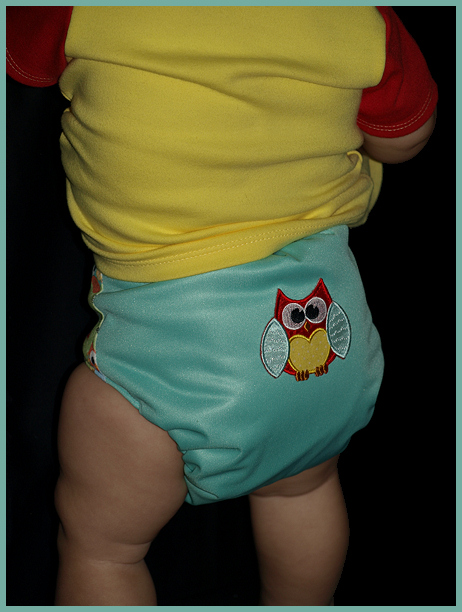
I was lucky to be able to test some of the products and I am just amazed. The quality is really unlike any other I have sewn with before. And the prints, well see for yourself they are oh so cute!!

I have lots more pictures to take, but we were rainy yesterday and today is more of the same. Doesn't make for good pictures! Here is 1 set that I had time to photograph this morning before Tristan took his morning nap. I will share more in the coming days!

Oh and if you want to follow Babyville Boutique and see when it will hit a store near you here is the link to FB.
http://www.facebook.com/pages/ZooTZ/177482377413#!/BabyvilleBoutique
Here are some quick pics!!

bb6

bb8

bb9

bb10

bb11

Wednesday, July 13, 2011


Long Time No Post

I can't believe it has been so long since I posted. Life has been very hectic lately and I just can't seem to get everything all together. Lately, we are doing better and I have begin to carve out a little me time once again. I love my baby, but I think I had forgotten about how much time in my day would go to just caring for him. He is such a delight and joy, I can't believe how fast the time is passing.

Tristan is such a smiley baby, even at 12, 2, 4 and 6 AM. Yes, you heard me right! This momma gets no sleep, even now at over 10 months old. Somehow my little guy missed the part about having to get his rest. He is on the go, ALL of the time!! No rest for the weary!!

I have sewn some in the last month, I need to go back and check my photo albums and update everything here. I love sewing for the summer!! I just wish my baby boy would grow a little taller so I had an excuse to sew something for him. His height is only about 3% on the charts, which means he hasn't grown a lot since 4 or 5 months old. I'm sure soon he will have a growth spurt and outgrow all of his mama made!

I owe the ladies that entered my drawing a HUGE apology. Life threw me for a little while and I did not get all of the packages out for the beanie scraps. IF you didn't get your package, please know that I will have it out this Monday. I am going through my big bin of scraps and finding fun ones for beanies!! Everyone should have gotten the PDF by email back when the drawing ended. If you didn't please post here and I will see about getting a copy to you.

And speaking of patterns, I am happy to say that I finally released my baby sack gown pdf this past week. It was a whopping success and I have already sold out of the first round in my etsy shop, zootz. I hope that everyone that purchases it will enjoy making baby gowns!! I just love sewing it and can't wait to see everyone's creations!!

Can't post without a pic, so here is a snap it up baby romper that I did for Tristan just yesterday. It matches diapers that I made a while back, I just love this print!

Happy sewing ladies and I hope to blog quite often now!! Oh, and I am trying to respond to comments, but blogger isn't letting me! Very frustrating. I hope that fix it soon, or I will have to find a new blog home!I have added a custom for this romper in my zootzbaby shop! Remember to use the code BLOG10 for 10% off anything in my shop!

http://www.etsy.com/listing/77819351/pirate-skulls-snap-up-romper-custom


Wednesday, March 9, 2011


My 1st Give a Way!!

In honor of my 50th post and my baby(not Tristan) my 1st baby turning 17 tomorrow, I am in the mood to give something away. So let's see. I know! I LOVE scrappy sewing, it is one of my favorite things to do. Whether I am using hard to find fabrics, little scraps left over from other projects or recycled odds and ends from tee shirts and such. My beanie PDF provides a really fun project that even the least experienced seamstress will love to sew. I think it takes me about 5 minutes now from cut to finish! This is probably my favorite pattern for my kids and has gotten the most use. My now 17 yr old loves to wear them, my daughter has wore them in her tween period and Noah my 7 yr old almost always has a beanie on his head. Tristan has a few already too, I guess they are staples of our wardrobe around here!

I will email 3 lucky winners a copy of my Scrappy Beanie PDF pattern and send them a few knit scraps to make a beanie with in the mail! Just leave a comment telling me who you would sew a beanie for(can be preemie up to an adult!) and what kind of beanie that person would like. You could say things like character fabrics, superheroes,bugs, stripes, dots, solids, cars, you name it and I will see if I can find a little something something in the stash! And PLEASE leave your email for me, so I can contact the winner. It's so sad when you win and no one can get a hold of you!!

I will leave the comments open until midnight, Sunday March 13,2011, EST of course! Winners will be posted on Monday, March 14, 2011!

Now let me hear who needs a beanie!!

Thursday, February 3, 2011

Jetro Romper Modification!

I have searched and searched for the perfect romper pattern for baby! I came very close this time with Ottobre's "Jetro" romper from the 4/2008 issue.

I loved that it was simple and there were snaps at the neck and diaper area. Easy to cut out and, and, and, well the good things stopped there. The "placket" they used for the neck area, was not a REAL placket, so it made the binding look either ridiculous or just plain bulky. And the idea of coverstitching binding around all of the legs and the ankle area, well that is just a pain in the you know what! My coverstitcher and I are pretty good gal pals and I had trouble going around all of the curves.

So for every problem there is a solution, here are two that I came up with. Follow these and I think you will love sewing up this romper and it will be your go to for baby!

NOTE: You will need to have the Ottobre 4/2008 issue to follow this modification tute. I did not write the pattern, it isn't mine, just modified it slightly to make it easier to sew.

Option A: Romper that snaps all the way down even through the ankle cuffs.

Option B: Romper that snaps all the way down, but not at the ankle cuffs.(MY favorite!)

Step 1: When cutting out your romper(A or B) you are going to cut 2 of the front, adding a 1/4" seam allowance to the inside of the pattern. Do NOT cut on the fold, but rather cut 2 out.
Step 2: Cut out the back of the romper, gusset and the sleeves from pattern. Your binding will need to be a little longer than what is suggested in the magazine. I cut a 2" wide strip across the whole width of my rib knit for the piece that goes up and back down the front. For the back of the legs I cut another pc 2" wide and about 13" long. Keep in mind, I made a sz 68, so it will vary a little with the size.
Step 3: Cut 2 cuffs out of rib knit for the ankles.
For Option A: I cut (2) 3" wide by about 10".
For Option B: I cut(2) 3" wide by about 8".
Step 4: Go ahead and put together your romper like the instructions say. First the gusset, next the shoulder seams, then sleeves and lastly the sides of the romper. NOTE: The instructions used binding for the sleeve edge. I chose to hem my sleeves for ease, but you could also add cuffs if you wanted to.
Step 5: Bind your romper. Starting at the bottom of one leg with your longer binding piece, go up, around the neck and back down the other side to the bottom of the other leg. With the smaller length of binding you will start at the back of the romper up one leg, gusset and back down the other leg.
You should then have this.
Step 6: Option A only, for Option B skip to Step 10. Take your 2 rib knits for cuffs, fold right sides together(lengthwise) and serge both ends.
Step 7: Turn cuffs out and press. I added a small square of fusible interfacing to each end and tucked it inside my cuffs for extra support for the snaps later on.
Step 8: Serge each cuff to the bottom of your romper, right sides together, flip down and then press.
Step 9: After pressing stitch a small straight stitch on your sewing machine, just to keep those pesky edges from rubbing against baby and sticking out.
Now go ahead and add your snaps! I started at the bottom of the legs(1 snap on each leg cuff) and worked my way up. Measuring my romper and adding snaps every 2 or 2.5 inches. At the crotch where the gusset meets I like to have 3 snaps pretty close together so there is no gap there. I dislike a gappy gusset!
Step 10:For Option B only! After my bindings, I went ahead and added my snaps for Option B. I just thought it made it easier to work with the legs this way. Some may choose to add the snaps last and that would work fine too!
Step 11: Before adding the cuffs, I overlapped my bindings at the bottom and sewed a stitch to keep them together while serging. Trust me, it may be an extra step, but if your binding slides when serging it's not pretty!
Step 12: Now serge your cuff ends together and then add your cuffs right sides together to the bottom of your romper. Just like you would a sleeve cuff. Pulling your ribbing gently, but not your fabric.
Step 13: Flip down and press! Your done!!
Now add your precious baby and you have a happy romper for the both of you!! These have both been baby tested and they work great for diaper changes!! I think Option B is a little less time consuming and was just as easy to take on and off as Option A.
I hope this will help! Happy Sewing!!

Thursday, January 6, 2011


Japanese Super Hero Raglan


Today's project was an easy one. I decided to sew up a matching raglan for the superhero beanie that I showed earlier this week. I traced the #1 papana raglan from the ottobre issue 4/2010 to see how I liked it. Super easy to sew up and all the seams matched up perfectly the first go around. Great pattern.


I'm not sure about the fit yet, little man decided he would nap for me today! Yeah! I think it will be great though based on Tristan's measurements. Going to change him after his nap and let him wear it when we pick his bubby up from school today.
ETA: I added some pictures after the tee was on little man. Great fit. Not a lot of room to grow though.

I think I will stay with the HTF Japanese fabric theme for now and go pull another fabric from the shelves. I'm thinking VW vans this go around!

I hope you are having a fabulous Thursday!

Thursday, October 21, 2010


Recycled Tag Blanket Tute
Today was a long day. My baby boy turned 2 months old yesterday and received his 1st series of immunizations today. Let's just say he was a little fussy this afternoon, but thankfully is dreaming sweet dreams now. After I laid him down tonight, I decided to get in my studio and make him a little treat.
I have been saving tags for a while now. You know, those adorable tags that your kids make you cut out of their tees because they itch. When you have 4 kids, tags are easy to come by!

So here is a little tute that I wanted to share. It's not a new idea by any means, but the measurements are listed to help you get started and I just love the look of the recycled tags. I think it turned out really well and I hope Tristan will love it!

Happy Sewing!!


Materials

(2) 13.5" square fabrics(minky,woven,recycled tee shirts,etc)
tags
1 snap
1 small scrap of fabric for loop

Directions

1. Cut out 2 squares from your fabrics, both 13.5" squared. I used minky because I had it readily available, but it would be really cute with recycled tee fronts too! I may have to try that the next go around!
2. Round your corners on your 2 squares. For this I take a small bowl, place it on the edges and cut my corners with a rotary cutter. Fast and easy!
3. Cut a rectangle 2" wide x 7" long from a scrap piece of fabric. I used a woven for this, but you could use a knit too. Iron the sides in so that they are touching and then fold over again, like you are making bias tape. I then tucked in the raw edges on one end and topstitched with the sewing machine.

4. Now go ahead and pin your tags where you would like them on one of your squares. Pin your strip(the raw edge) to a corner. All of your tags and strip should be pinned inward onto your fabric along the edges.

5. Lay your other square on top, right sides together and pin, pin, pin!! I am a big fan of pinning your work, especially when it stretches like minky does.


6. Take your pinned fabrics and go around them on a sewing machine. I used a small seam allowance because I wanted to make sure that the pictures on my tags showed when sewn. Remember when sewing these kind of fabric, slow and steady wins the race!! Go slow and make sure your edges and tags are all meeting up as you sew.

IMPORTANT: Don't forget to leave about 2 inches free to turn your blanket out at the end.


7. After you have sewn around, leaving a turnout spot, Turn it Out, and topstitch the area closed. I then went ahead and zig zagged around my blanket edges.(this is optional)

8. Add your snap to your loop, one part should be close to the blankets edge, the other close to the other end of your strip.


9. Ta da, all done! Isn't that cute!! You can use the loop to attach the blanket to the carrier, so baby doesn't throw your hard work overboard or you can attach baby's binky through the loop. I don't have a modeling shot of the binky, it's currently in use!